
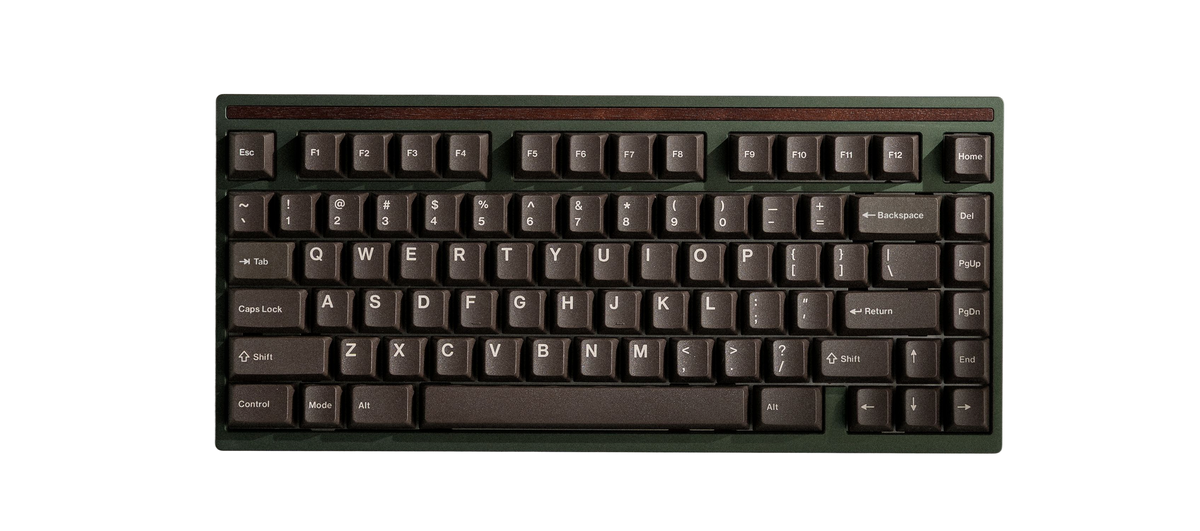
Designing the Crown Mounting System

The Crown Mounting System is Mode’s new mounting architecture, built around a wave spring and a tuned isolation stack that shapes both feel and sound in ways traditional mounts can’t. Anchored to the top of the keyboard chassis with a shoulder bolt for stability, it is designed to deliver three things at once:
- A stable feel without harshness.
- A springy, responsive return.
- A clean, full sound with less unwanted resonance.
The Crown Mounting System, Overview
The Crown Mounting System (CMS) is a top-mounted assembly that combines a tuned silicone stack with a wave spring to control how the internals move and how vibration travels through the case. The goal is straightforward: keep the board stable while preserving a springy return, and reduce the kinds of contact points that create metallic ping and desk-borne resonance. The Crown Mounting System was designed for the Prologue keyboard and refined through hands-on testing with development testing on the redesigned Encore keyboard.
To build it right, you have to build it again and again
Mode founder and CEO Jaicob shared a principle that stayed with us throughout this project:
“If you want to make something good, make it as many times as you can. The first time you create something, you’re learning what you’re up against. The second time, you work faster and better, though you’ll inevitably overcorrect in some areas. Each subsequent iteration closes the distance to perfection by half, never quite reaching it, but improving every time.”
That idea kept us focused during the long development cycles of the Crown Mounting System. The only way to make a new mounting system feel right is to build it, test it, break it down, and build it again.

What a mounting system actually does
A mounting system is the foundation of a mechanical keyboard’s typing experience. It connects the keycaps, switches, plate, and PCB to the chassis, and it shapes how the keyboard moves and how vibration moves through the keyboard.motion and vibration move through the keyboard.
Most traditional mounts come with tradeoffs:
- Stability vs. harshness: Rigid mounts, like fasteners that screw directly into the chassis, are stable, but they can sound metallic, feel stiff or fatiguing.
- Softness vs. mushiness: Softer mounts, like silicone or foam gaskets, can sound pleasant, but they can feel uneven or mushy.
Our goal was simple to describe but difficult to achieve: stable without harshness, responsive without mush, and clean sound without resonance.
Defining “good”: feel and sound, spelled out
We stopped trying to describe “good” in vague terms. Instead, we defined what we wanted and what we didn’t.
Feel
We wanted:
- Springy and responsive.
- Stable (minimal X + Y movement).
- Consistent across the entire board.
We didn’t want:
- Mushy or uneven feel.
- Overly stiff or fatiguing typing.
- Excess rocking or bending.
Sound
We wanted:
- Clear and full.
- Minimal ping or resonance.
- Isolation from the desk.
We didn’t want:
- Metallic resonance.
- Hollowness or rattling.
- Sound transfer into the desk surface.
Those lists gave us a way to evaluate prototypes honestly and make better decisions as we explored options. In addition to these main criteria, we also wanted the new mounting system to look good, so materials and aesthetics were major considerations.
Fresh perspectives: collaborating with SWOPE Design
To approach the problem with fresh eyes, we partnered with SWOPE Design Solutions in San Francisco. We wanted to approach the system first as a mechanical engineering problem, without the assumptions and biases that can creep in when you’ve been immersed in keyboards for too long.
We explored multiple mechanisms to chase the same outcome:
- Different suspension concepts and spring configurations.
- Isolation approaches, including material choices and geometry.
- Fastening concepts, and how the mount ties into the chassis.
Some options felt promising but sounded off. Others were intriguing but overly complex. And some simply took up too much space.


We also started capturing more quantitative data, like vibration decay and frequency response, alongside hands-on feel and sound tests. The benchmark was clear: any new system had to outperform our existing lattice mounting system.


The breakthrough: wave spring feel
One prototype stood out immediately. The return felt snappy on the first keystroke, and the sound was noticeably cleaner.
The key component was a wave spring. It’s a compact spring with a wave-like form that produces consistent resistance in less vertical space than a traditional compression spring.
But the first wave spring implementation had a real problem: too much side-to-side movement. The assembly sat below the internals with too much freedom. It was fun, but not stable, and it raised real questions about manufacturability.
Still, the signal was clear. The feel and sound was worth chasing.


The modular test board
Since we were developing a brand-new mounting system, we needed a keyboard to test it in, but the keyboard we were designing this for was still far from complete. The Prologue was still in development, and waiting for a full prototype would have slowed everything down.
So Andrew built a three-piece modular test board. It was a dedicated platform built for rapid swapping, repeatable testing, and honest comparisons.


At its best, a test rig does one thing: it turns opinions into patterns. The modular board gave us a controlled way to feel and hear the effects of each change, without rewriting the entire build every time.
The modular test board allowed us to:
- Swap mounting configurations quickly without rebuilding the full keyboard, so we could compare concepts back-to-back while the feel and sound were still fresh.
- Iterate and manufacture parts faster by focusing on a small set of interchangeable components, which made 3D prints, silicone samples, and hardware revisions practical at a high cadence.
- Compare materials and geometries on equal footing (silicone shapes, spring variants, interfaces), using the same baseline build so we weren’t chasing noise from unrelated variables.
- Run more iterations in less time because the board was designed for disassembly and repeatability, not beauty or completeness.
- Isolate variables for controlled testing by changing one element at a time, so when something got better (or worse), we could actually trust the conclusion.
That test board became our workbench for deciding what was real progress and what was just novelty. It’s where most of the Crown Mounting System’s “feel” was earned before we ever put it into a production-intent case.
In-house refinement: eight months of iteration
After early exploration with SWOPE, we brought the concept in-house for detailed refinement. Over the next eight months, we went through dozens of iterations, 3D printing, molding silicone, testing, adjusting, and repeating.
Variables we tuned
- Wave spring spec: size, weight, and material behavior.
- Silicone geometry: how it holds the spring, isolates vibration, and controls motion.
- Fastening approach: how the system ties into the chassis.
- Slider geometry and materials: bushing vs. sleeve, and the search for the right blend of durability and lubricity. So motion stayed guided, smooth, and consistent without adding play or friction.
- Mounting points: the number and location of mounting points, to keep the typing experience even across the board without adding unnecessary stiffness.
- Bumper geometry and materials: pads key contact points along the top case, reducing vibration and cutting down resonance.
- Tolerances: controls clearances across the stack, setting spring compression and preventing unintended contact or binding.
The turning point: top-mount integration
The big unlock came from a simple question from our Chief Design Officer, Matthew: What if we suspended the wave spring from a top-mount fastener?
Traditional top-mount keyboards feel stable because the internal assembly fastens directly to the top of the chassis. Our engineer, Andrew, borrowed that principle and designed a stacked system that uses top-mount stability to eliminate side-to-side movement while preserving the springy return we liked. As a bonus, the whole assembly came together with a clean, purposeful fit.

Real-world validation: the Encore test
After many cycles of testing in our modular test board, we were ready for the question the rig couldn’t fully answer:
What happens when the system has to live inside a real keyboard?
So we adapted the Crown Mounting System into a redesigned Encore prototype to test it in a complete, real-world stack. The Prologue was still in development.
The results were honest: for some reason, it didn’t feel and sound as good as it did in our last iteration of the test board.
It was frustrating, but it was exactly the kind of feedback we needed. The modular test board helped us define the system's core character: stable, springy, responsive. The Encore test revealed what still wasn’t solved: how that character translated once the mount was coupled to a full case, feet, and desk.
That shift, from controlled rig to full product context, was the moment the work became less about inventing a new feel, and more about tracing the acoustic chain and eliminating the subtle contact paths that were letting resonance creep back in.
Following the acoustic chain
When something sounds off, you trace the whole path:
Keycaps → Switches → Plate → Mount → Case → Feet → Desk
We tested the same build while changing one element at a time, looking for the contact path that was letting resonance sneak back in. The culprit turned out to be tiny, easy-to-miss interfaces, small points of contact that mattered more than they seemed.
Dozens of small refinements
The fix wasn’t one dramatic change. It was a long list of small ones:
- Tolerance tuning to prevent unwanted contact and over-compression.
- Material changes where silicone wasn’t shaping sound the way we needed.
- Interface geometry tweaks across the stack, so parts moved freely where they should and stayed quiet where they shouldn’t.
- A shift to a spool-style over-molded silicone shape to allow controlled movement while isolating vibration.
This stage felt like tuning an instrument. Small changes, repeated until the build stopped surprising us.

And this is where the process gets mentally demanding. You’re far enough in that the work has momentum, but close enough to the details that it’s hard to tell whether you’re making progress, or just making changes.
Matthew put it simply:
“You get so far into it that turning back isn’t really an option, but you also can’t see the finish line yet. You’re deep in the middle, hoping the next round of changes is the one that finally clicks.”
So we leaned on criteria. We meticulously tested and changed one variable at a time, relying on prototypes to tell us, honestly, whether we were moving forward or just moving.
Over time, the noise began to fade. The feel stayed consistent. The sound got cleaner. Eventually, the changes stopped feeling like guesses and started to read like a system we could trust.
The crown: naming the system
Late in the process, we needed a name for packaging and marketing. Internally, we’d been calling it the “mounting bolt system,” which said what it was, but not what it felt like.
We tried a lot of options, but kept rejecting anything that felt forced or forgettable.
The answer was hiding in the hardware itself. The form of our fastener was influenced by the design of watch crowns: the knob used to set time.
There was a real connection, and so it became the Crown Mounting System.

The moment of truth: Boston testing
After more than a year, the team met up in snow-covered Boston to test the latest prototypes.
We built the board, loaded it with switches and caps, and typed.
This time, it clicked.
The feel was stable but responsive, with a springy return. The sound was clean, without a metallic ping. The Crown Mounting System finally met the standards we set at the beginning.
There were still minor refinements to make before production, but the core system was finally in place.


How the Crown Mounting System works
The Crown Mounting System is a stack of components designed to control movement and shape sound.
Component stack
- Crown fastener: anchors the entire assembly to the top case with a hard stop, so compression is consistent every time.
- Silicone spool: cradles the spring and acts as the damper, controlling contact points and reducing vibration before it reaches the case.
- Wave spring: provides the “spring” in the system, delivering a snappy return while taking up less vertical space than a traditional spring.
- Bushing: the low-friction interface between the mount and plate, keeping movement smooth and guided without binding or chatter.
Key characteristics
- Stable, locked-in feel with reduced rocking and lateral movement.
- Springy, responsive return that feels lively without turning soft or uneven.
- Cleaner sound profile with reduced metallic ping and resonance.
- Consistent experience across the board so flex and feel stay uniform from edge to edge.
What’s next
The Crown Mounting System is Mode’s wave spring mounting architecture paired with a tuned wave spring and damper stack. It was earned through over a year of prototyping, tuning, and validation, and it is built to deliver a stable feel, springy return, and a cleaner, more consistent sound.
Future possibilities
Because the system is modular by nature, different spring weights, materials, and geometries can unlock distinct typing profiles in future products.


Experience the Crown Mounting System
The Crown Mounting System was designed for the Prologue, releasing Summer 2026, and is available now in the redesigned 2026 Encore keyboard.
Frequently asked questions
Crown Mounting combines top-mount stability with wave spring suspension and tuned vibration isolation. Instead of forcing a trade between stability and comfort, it aims to deliver a stable, consistent feel without harshness, and a clean sound without metallic resonance.
A wave spring is a compact spring where the coils form waves. When compressed, the waves flatten and spring back, delivering responsive return in less vertical space than a traditional spring. In the Crown Mounting System, it’s the component that creates a springy, consistent return.
Because the system is modular by nature, different spring weights, materials, and geometries can unlock distinct typing profiles in future products.
The Crown Mounting System was designed for the Prologue and the redesigned 2026 Encore. For the latest model-specific details, check the current product pages on modedesigns.com.
Over a year end-to-end, from early exploration with SWOPE through in-house refinement and final validation.
The name comes from the watch crown, the knob used to set a watch, which influenced the form of the mounting fastener.
Frequently Asked Questions
What is the Crown Mounting System?
The Crown Mounting System is Mode's proprietary top-mounted architecture that pairs a wave spring with a tuned isolation stack. It combines top-mount stability with wave spring suspension to avoid the usual trade-off between a stable feel and a comfortable, springy typing experience. The result is a stable, consistent feel without harshness and a clean sound without metallic resonance.
What is a wave spring and why does it matter for typing feel?
A wave spring is a compact spring whose coils form a wave-like pattern rather than a traditional coil. When compressed, the waves flatten and rebound, producing consistent resistance and a snappy return while occupying less vertical space than a traditional compression spring. Within the Crown Mounting System, this component is responsible for the springy, responsive character of the keystroke.
How is the Crown Mounting System different from traditional mounting styles?
Traditional mounts typically force a compromise between rigidity and softness. Rigid mounts, such as fasteners screwed directly into the chassis, offer stability but can feel stiff and sound metallic, while softer silicone or foam gasket mounts can sound pleasant but feel mushy or uneven. The Crown Mounting System was engineered to deliver stability without harshness, responsiveness without mush, and a clean sound without unwanted resonance, all at once.
How long did it take to develop the Crown Mounting System?
The Crown Mounting System was developed over more than a year from concept to final validation. The process began with early exploration alongside SWOPE Design Solutions, continued through eight months of in-house refinement, and concluded with final validation testing in Boston. Dozens of iterations, spanning spring specifications, silicone geometry, fastening approaches, and tolerances, shaped the final design.
Where did the name Crown Mounting System come from?
The name was chosen late in development, once the team needed something more evocative than its internal working title, the mounting bolt system. It draws directly from the design of watch crowns, the knob used to set time, which had influenced the form of the mounting fastener itself. That visual and mechanical connection made Crown Mounting System the fitting choice.
Which keyboards feature the Crown Mounting System?
The Crown Mounting System was originally designed for the Prologue keyboard and refined through testing on the redesigned Encore. It is available now in the redesigned 2026 Encore keyboard, with the Prologue set to release in Summer 2026. Because the system is modular, future products may introduce different spring weights, materials, and geometries for distinct typing profiles.